A tripod is one of the most important accessories a photographer should carry. It is a three-legged stand that holds your camera in place so you can get sharp and stable images. A tripod allows you to slow down your shutter speed by several stops, using lower ISO settings and larger aperture values. It also keeps your camera away from shaking hands while taking pictures hand-held.
Another great benefit of using a tripod is that it can help you compose better photos due to its flexibility. With a tripod, you do not have to rush or squeeze yourself into positions just to get the shot you want. You can take time on arranging the scene before taking some sample shots and evaluate them in between before deciding for the final image composition. Here’s how it works when shooting with a tripod:
A tripod is an essential piece of photography equipment, since it helps you take great photos. They are especially useful when taking pictures in low light, taking long exposure shots and shooting with a lens that has a slow shutter speed.
You can buy tripods that range from very cheap to very expensive, but the most important consideration is to choose one that is sturdy enough for your camera. For example, if you have a large DSLR camera with a heavy lens attached to it, then you will need a stronger tripod than someone who only takes pictures with their cell phone or point-and-shoot digital camera.
When buying a tripod, be sure to ask about the maximum weight capacity of each model. Most manufacturers will list the maximum weight capacity in pounds (or kilograms), which makes it easy to determine if the tripod can handle your camera and its accessories.
If you plan on using your tripod for many different types of photos (including macro photography), then I recommend buying one that has adjustable legs instead of fixed legs. This way, you can adjust the height of your tripod according to the type of shot being taken or
““
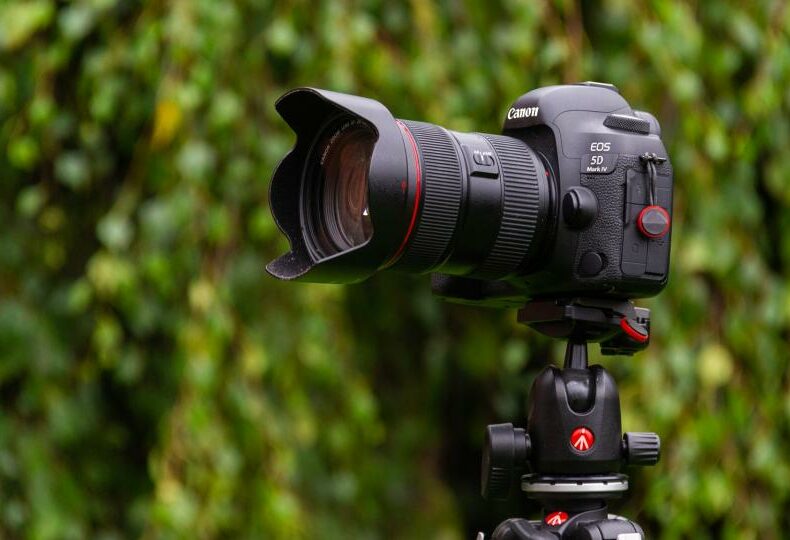
The first step is to set up your tripod. To do this, you will need to mount your equipment onto it, extend the legs and lock the legs. Make sure that the tripod is stable and positioned on a solid base. It should not wobble when you push it lightly from side to side. Avoid placing the tripod on soft or uneven ground; instead, find a level spot with solid foundations like concrete or tile flooring.
To mount your camera on the tripod, you can either screw it on directly or use a quick release plate attached to your camera’s base for faster mounting and dismounting of the camera from the head of the tripod.
- The first step is to set up your tripod and camera.
- Take a test shot to ensure that you are framing the image properly.
- If you want to speed up the process, this can be done by setting your focus before mounting the camera on the tripod. You can set your focus by half-pressing the shutter button or using live view. If you are zoomed in, use manual focus. In either case, make sure that everything is focused before setting up the rest of your equipment.
- Once you have confirmed that everything is looking good, take out any remote control (cable release) and connect it to your camera (with DSLRs, this is done with a cable). This will allow you to influence shutter speed without touching the camera, which could cause shaky photos if done improperly. Use mirror lockup if it’s available on your model of camera (it should be available with most DSLR cameras).
- Now that all of your equipment is ready, take a photograph! Check out how it looks and make adjustments as necessary – did things come out too dark? Too light? Is there still a little bit of motion blur from pressing down on the shutter button? Repeat steps 2-4 until you find an image that meets your expectations for quality.
- With the right camera settings, you can get great photos with a tripod.
- Exposure time
- ISO
- Aperture
- White balance
- Focal length
- Depth of field (DOF) is indicated by f-number or f-stop, which is calculated from the focal length and aperture. The bigger the numbers are, the smaller depth of field it will be. Below are a few examples of different depths of field:
- Camera shake: The amount of camera shake depends on the focal length, shutter speed and camera-holding technique. While using a tripod, camera shake can occur due to wind. A tripod cannot eliminate vibrations caused by wind.
- Blurriness/focus issues: Tripods are used for stability when capturing pictures in low light or when using long focal lengths, which results in blurriness if the subject is not stable. It can also cause focus issues when you want to capture a still photo without focusing on a particular part of the subject.
- Photographer’s shadow: If you shoot from lower angles, your own shadow might appear in your frame while shooting outdoors or inside bright areas with plenty of natural light entering through windows or skylights.
- Tripod shadow: You may get unwanted shadows if your tripod is positioned directly between the subject and the source of light like in macro photography. You can use an umbrella to prevent a tripod shadow on your subject during outdoor shoots or capture it at an angle where it will not cast any direct shadow on your subject area.
- Background: Sometimes, tripods can give away too much information about time and place by including unwanted elements like other people or cars behind the photographer who are unconsciously placed due to lack of attention towards background elements (thereby failing one of photo composition basics).
With the use of a tripod, you can take better pictures by following these steps:
- Use a remote shutter release.
- Set the right camera settings.
- Set the right focus.
- Set the right exposure.
- Use noise reduction.
- Use mirror lockup.
To sum up “How to Take Pictures With a Tripod?”:
- Set up your tripod and camera.
- Determine how long the shutter should stay open based on your lighting situation.
- Composition is key! Decide what you want to be in the frame and where you want it to be in that frame, and then adjust the tripod accordingly. You can also use it as a makeshift monopod, or even as an impromptu ladder!
- If needed, add some light with an external flash or reflector (or both). This will allow you to create more dynamic compositions and get the most out of your photography equipment.