If you’re looking to get the most out of your GoPro, you need to know how to mount it to a tripod. Whether you’re using a camera with a built-in tripod or you’ve purchased a separate one, there are a few ways you can attach your GoPro to a tripod.
In this post, we explain how to mount GoPro to tripod. We also provide some tips and tricks to help you mount the camera properly and get the best shots.
When choosing the right tripod for mounting your GoPro to, there are a few things to take into account. There are many different GoPro tripods on the market, and it can be hard to decide which one is right for you. Here are some tips on choosing the right GoPro tripod:
1. Make sure the tripod has a mounting bracket that will fit your GoPro. Many tripods come with a variety of mounting options, so be sure to choose one that will work best with your camera.
2. Consider how tall and wide your GoPro camera is. Some tripods have adjustable legs that allow you to make them taller or wider, depending on your needs.
3. Look for a tripod that has multiple ball bearings in the head so it can move smoothly and vibration free when filming footage.
To find a suitable mounting point for your GoPro camera, consider its purpose and weight. For example, if you plan to use your GoPro mostly for recording video footage, choose a mount that is lightweight and easy to carry. If you’re using it mainly for photographs or videos with slow-motion effects, go for a more robust mount that can withstand heavier use.
Additionally, consider the type of tripod you have available. Some tripods have screw holes that fit GoPro mounts well; others require specialized adapters or mounts. Make sure to check the specifications of your tripod before purchase so you can find the right fit.
The next step is to screw in the mounting plate. This may take a little bit of effort, depending on how tightly the mount was attached to your tripod. If you’re using a screw-mount tripod, the plate should be an exact fit. If your tripod has holes in the legs, you can use those to hold the mount in place.
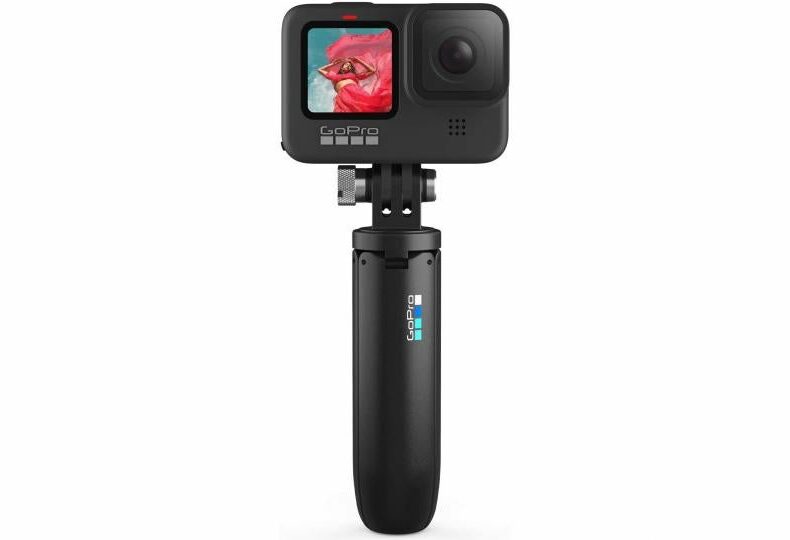
If your camera has a mounting plate on the bottom, you can attach your GoPro directly to it. The mount should fit snugly without any wiggling or loosening of the camera. If your camera has no mounting plate, you need to attach the mount to a tripod first. Attach your GoPro to the mount and tighten the clamp down on the camera.
If you want to adjust the position of your camera, you may need to loosen the clamp. If you’re using a screw-mount tripod, you can use a hex wrench or Allen wrench to loosen the bolt on the tripod head.
This is a good time to make sure everything is working together so you can get the best picture possible. You might also want to take a test shot. It’s always a good idea to check your settings on your camera or video recorder before you start recording.
If you’re serious about taking great GoPro footage, mounting your camera to a tripod is an important step. A good tripod will provide smooth, stable footage that’s easier to edit and less likely to be shaky. Here are a few tips for mounting your GoPro:
1. Choose the right mount. There are a variety of mounts available, from basic mounts that slip over your camera’s lens, to more sophisticated mounts that attach to the tripod head or handlebars. Look for a mount that fits your camera and shooting style.
2. Choose the right tripod. A good quality tripod will provide smooth footage and be stable enough for high-action shots. Make sure the mount is compatible with the type of camera you’re using and find one that’s light enough to carry without adding extra weight to your gear bag.
3. Choose the right location. Think about where you want to shoot and how easy it is to get there. If you’re planning on shooting a lot of adventure sports, keep in mind that the mount can be heavy and cumbersome.
4. Mounting point first, go second. The first thing to do is make sure you have an adequate mounting point for your camera and lens. Mount the tripod’s base plate over the mount and then secure it to a solid surface (preferably a flat, broad surface). Now you can use the tripod’s head to hold your camera and lens. Once you’ve got the mount secured, go ahead and secure your camera and lens.
5. Avoid windy locations. Don’t mount your tripod in a place where there is a lot of wind. The wind can cause your camera and lens to move, which will make it difficult to capture the exact moment you want. Instead, mount your tripod in a place where there isn’t much wind.
6. Use a good camera support. Don’t skimp on your tripod’s support system. A tripod’s support system can make or break your images. If you don’t have a good support system, your photos will suffer from camera shake. A tripod’s support system also makes it easier to change lenses on your camera.
7. Focus manually. Most of today’s digital cameras have autofocus, but if you want to get a photo where the focus is set manually, use a tripod. You’ll need to use manual focus when shooting at night or in low light situations.
8. Use a remote shutter release trigger. Even the most expensive digital cameras have a few features that you can turn off. One of these features is the shutter release. If you want to take a picture with your camera, but not use the self-timer, you need to use a remote shutter release trigger.
If you have any questions, please don’t hesitate to call us. Our friendly and helpful staff would be happy to help. Thank you for visiting the GoPro Mounting Guide Store!